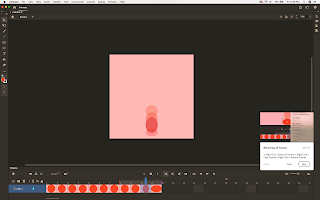
Assignment 3A - Exploring Adobe Animate

 PART 1.) Create the bouncing ball animation per the in-class tutorial (you can watch the video of the class session in the Files section of Canvas) and post it to your blog.

Post the GIF on your blog and title your post Assignment 3A - Bouncing Ball (or something similar). Post the GIF as if it was a photo using Insert Image. You cannot post it using Insert Video.

NOTE: You can export is as a GIF with OR without the background showing by selecting or de-selecting the Transparency option.

A step-by-step tutorial follows below the bouncing ball GIFs.

PART 2.) SCROLL WAY DOWN FOR PART 2 OF THIS ASSIGNMENT.


Here are the steps:

1.) Create a square or rectangle as your background and fill with any color.

2.) Create a ball and fill with any color (hold the shift key while you draw to create a perfect circle): 


PART 2.) Create a second bouncing ball animation with the following parameters:
1.) create a new project that is either 400 by 400 OR 720 by 720

2.) create a background that is NOT transparent
3.) create at least two (2) moving objects within your animation
4.) have at least one of the objects change size or rotate or modify its shape in some manner and use squash and stretch, if appropriate for your animation
5.) you can also animate text
6.) export the project as an animated GIF and post it to your blog (post as a PHOTO, not a video)
IMPORTANT:  MAKE SURE EACH ASSET IS ON ITS OWN LAYER!

As before, save your project as an Adobe Animate file AND export it as a GIF, being sure to set the animation to Loop Forever. Post the GIF onto your post previous Assignment 3A - Bouncing Ball (or something similar) post by clicking on Revert To Draft, which allows you to edit your post. Post the GIF as if it was a photo using Insert Image. You cannot post it using Insert Video. 


PART 3.) Create a third animation using a rectangle or square. Rotate the rectangle/square as it moves around the stage. Post the new animation to your blog.


Comments

Popular posts from this blog

Importing Illustrator Files into Animate

  Animate lets you import Adobe® Illustrator® AI files and preserves the majority of the editability and visual fidelity of your artwork. The AI Importer also provides you with a great degree of control in determining how your Illustrator artwork is imported into Animate, letting you specify how to import specific objects into an AI file. The Animate AI Importer provides the following key features: Preserves editability of the most commonly used Illustrator effects as Animate filters. Preserves editability of blend modes that Animate and Illustrator have in common. Preserves the fidelity and editability of gradient fills. Maintains the appearance of RGB (red, green, blue) colors. Imports Illustrator Symbols as Animate Symbols. Preserves the number and position of Bezier control points. Preserves the fidelity of clip masks. Preserves the fidelity of pattern strokes and fills. Prese...

Assignment 7 - Motion Path in After Effects

PART I:   Watch this Adobe tutorial on creating a motion path using Adobe After Effects and practice with the files provided during class:   Create a path Select a layer and use the Pen tool to create anchor points for a path. Click and drag to add anchor points and expose the handles. Move the handles to adjust the shape of the path. Use the path to create position keyframes Switch to the Select tool in the Toolbar. Select the layer which contains the path and press M to reveal the Mask Path property. Select the words Mask Path and then choose Edit > Copy to copy the path. Select the layer to which you want to apply the path and press P to reveal the Position parameter. Select the word Position in the Timeline and choose Edit > Paste to add the path data as Position keyframes. Change the timing of the animation Deselect all the keyframes. Then drag the first or last keyframe to change the duration of the animation along the path. Orient the object along the path ...