CREATING TITLES USING PREMIERE AND iMOVIE (for iMovie instructions, scroll down):
CREATING YOUR TITLE USING PREMIERE:
Titles can be created right inside Adobe Premiere Pro and you can add a name (a.k.a. lower third, chyron,
super), can create captions or subtitles, and even build
entire credit sequences.
Here’s how to do it:


- Choose File > New > Title
- Specify the title name and click OK
- TIP: Adjust the timeline playhead to the position where you’d like the title to appear. This will be used as the background video when you’re working on your title.
The built-in Titler tool will open up, where you’ll be able to create your title. Here’s a quick overview of the Titler tool:
- Tools (top left): Choose different tools to work with on your titles
- Actions (bottom left): Align, center, and distribute your titles accordingly
- Properties(right): Customize your titles
- Styles(bottom center): Choose from a collection of title styles


- Choose the Type Tool on the top left
- Click anywhere in the main window to create a text box
- Write your text
- Once done, choose the Selection Tool (arrow) and position your title
- TIP: Use the Center action tools to center your titles horizontally and vertically

You can customize your title using the Properties bar (Size, Font, Color). Make sure the text box is selected when you want to make changes.
- Tip: You can also select different parts of your text using the Type Tool and modify them separately. This can be useful if you’d like to have size or color differences in one title.
There are also pre-set Title Styles you can choose from. Again, make sure your text box is selected and then make the changes.

Once you’re done customizing your title, close the Titler tool and
your title will appear in your Project window under the name you
specified.

- Drag your title from the Project window onto the timeline
- Position the title clip accordingly on the timeline and adjust its length if needed
- You can also add transitions to the start/end of a title
If you’re working with titles on a regular basis, it can be useful to create templates to save some time. You can import your titles as templates and load those whenever you need them.
To import a title as a template:
- Open your title
- Choose Title > Templates
- In the Templates window, click on the top-right menu
- Choose > Import Current Title as Template

To load a template, simply choose from the list of User Templates on the left side and choose OK. In the future, you can also choose Title > New Title > Based on Template.

With your movie open in the timeline, select Titles above the browser.

Available title styles appear in the browser. If you’ve set a theme for your movie, titles related to the theme appear at the top of the browser.
Browse the titles to find the one you want to use, or use the search field to search for the name of a particular title.
Many titles are animated, which means they move on the screen in an interesting way. Skim the title thumbnails in the browser to see how they move.
Do one of the following:
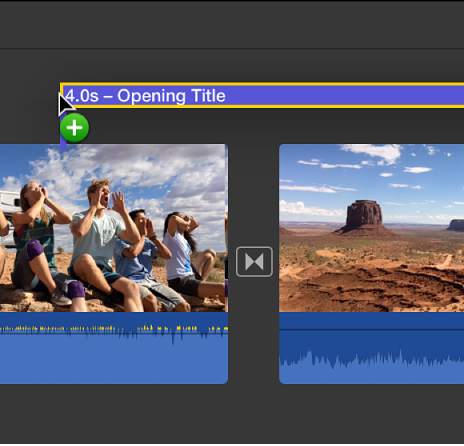
In the timeline, position the playhead where you want to add the title, and then double-click the title in the browser.
The title is added to your movie at the position of the playhead.
Drag the title to the timeline, above the clip where you want the title to appear.
If snapping is turned on (click the View menu and make sure Snapping has a checkmark next to it), the edges of the title align with clip and transition edges. As you drag, a vertical yellow line appears when either end of a title is aligned with either end of a clip.
Drag the title to the timeline, over the clip where you want it to appear.
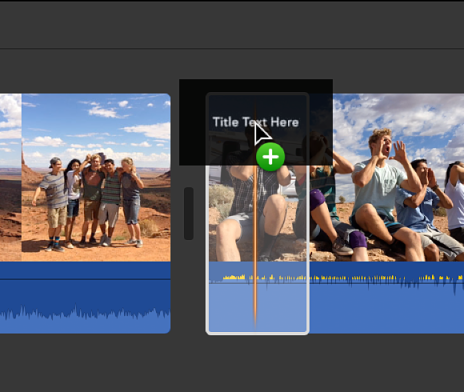
If you position the title in the first or last third of the clip, the title’s duration is automatically adjusted to appear in that third of the clip. If you position the title in the center of the clip, the title’s duration is adjusted to appear over the entire clip.
Select the title in the timeline, or move the playhead over the title.
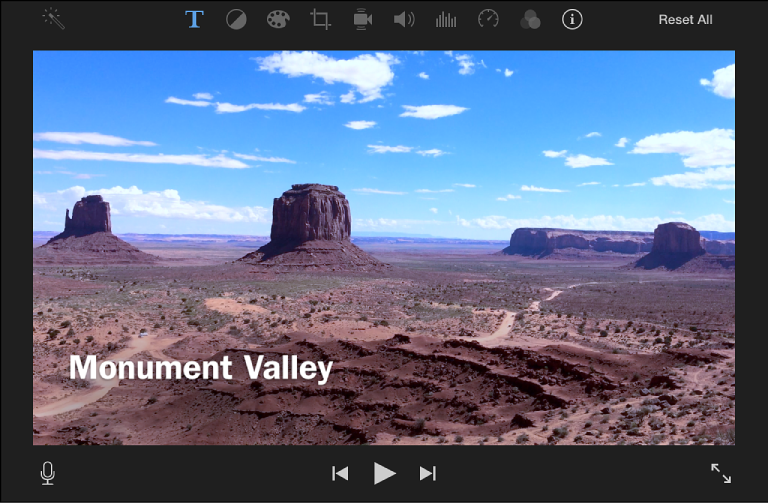
In the viewer, select the placeholder text by double-clicking it, and type the text you want to appear.
Some title styles in the Sports theme appear in the viewer with pop-up menus, which you use to choose the team and player you want to appear in that title.
To change the title’s appearance (its font, color, size, style, or alignment), use the font controls above the viewer.
NOTE: You can’t change the font in certain theme-styled titles and some animated titles.
When you’re finished, click the Apply button
 above the viewer.
In the timeline, select a title bar.
A yellow border appears around it.
Choose Edit > Delete (or press the Delete key).
Comments
Post a Comment