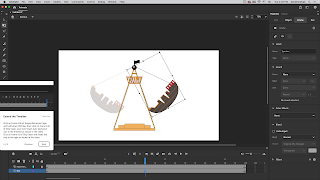
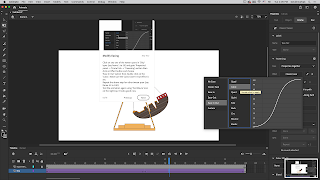
Assignment 3B - Basic of Tweening and Easing

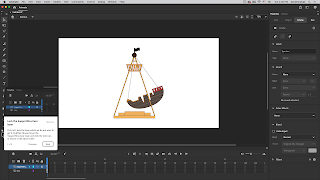
Please create the in-app tutorial on the Amusement Park Swing and post it to your blog as Assignment 3B. 


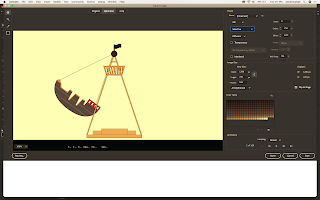
When saving the project, do NOT share to social media if you want an animated GIF, as shown in the tutorial video, as the background will be white. Instead, do the following:

Go to File -> Export -> Export Animated GIF

Make sure "Selective" is checked in order to get the best color reproduction (it is located under "GIF" and above  "Transparency"), make sure "Transparency" is NOT checked, and that "Forever" is chosen in the "Looping" section.

Comments

Popular posts from this blog

Assignment 8 - Create Animated Backgrounds

Assignment 8 - Use a Generate effect to create an animated background Download the Zip File sent to you via PBSC email in order to create this project. There are three parts to this assignment. Please create these two effects shown below for Part I and Part II of this assignment and post them to your blog. You may use creative license and need not recreate these exactly as shown. PART I:  Generate an animated background Generate effect create animated graphic elements from scratch that you can use to create an animated background. Create an animated background using a Generate effect You can create seemingly complex animated elements from scratch using Generate effects. These effects need to be applied to a layer and are typically applied to a layer solid or an adjustment layer. To create a background filled with animated stripes: From the main menu, choose Layer > New Solid . In the Solid Settings dialog box, cl

Importing Illustrator Files into Animate

  Animate lets you import Adobe® Illustrator® AI files and preserves the majority of the editability and visual fidelity of your artwork. The AI Importer also provides you with a great degree of control in determining how your Illustrator artwork is imported into Animate, letting you specify how to import specific objects into an AI file. The Animate AI Importer provides the following key features: Preserves editability of the most commonly used Illustrator effects as Animate filters. Preserves editability of blend modes that Animate and Illustrator have in common. Preserves the fidelity and editability of gradient fills. Maintains the appearance of RGB (red, green, blue) colors. Imports Illustrator Symbols as Animate Symbols. Preserves the number and position of Bezier control points. Preserves the fidelity of clip masks. Preserves the fidelity of pattern strokes and fills. Preserves object transpa

Assignment 7 - Motion Path in After Effects

PART I:   Watch this Adobe tutorial on creating a motion path using Adobe After Effects and practice with the files provided during class:   Create a path Select a layer and use the Pen tool to create anchor points for a path. Click and drag to add anchor points and expose the handles. Move the handles to adjust the shape of the path. Use the path to create position keyframes Switch to the Select tool in the Toolbar. Select the layer which contains the path and press M to reveal the Mask Path property. Select the words Mask Path and then choose Edit > Copy to copy the path. Select the layer to which you want to apply the path and press P to reveal the Position parameter. Select the word Position in the Timeline and choose Edit > Paste to add the path data as Position keyframes. Change the timing of the animation Deselect all the keyframes. Then drag the first or last keyframe to change the duration of the animation along the path. Orient the object along the path Go to Lay